

A lot of people have drywall installed in their homes. A cost-effective solution, it is quite easy to install or replace drywall and due to its composition, it can be cut in a lot of sizes to fit in all sorts of homes. Having drywall installed in your home is great for insulation during winters as well as keeping your home cool during the summers. In cases of damage due to disasters or even regular holes caused by door-knobs or nails, patching and repairing drywall is not a difficult task. Let’s find out more about the process as well as the costs involved to patch and repair drywall.
Tools required:
- Drill
- Drywall saw
- Utility knife
- Drywall knives
- Tape measure
- Paintbrush and roller
- Putty knife
- Dry sponge
- Sandpaper
- Stud finder
Step 1:
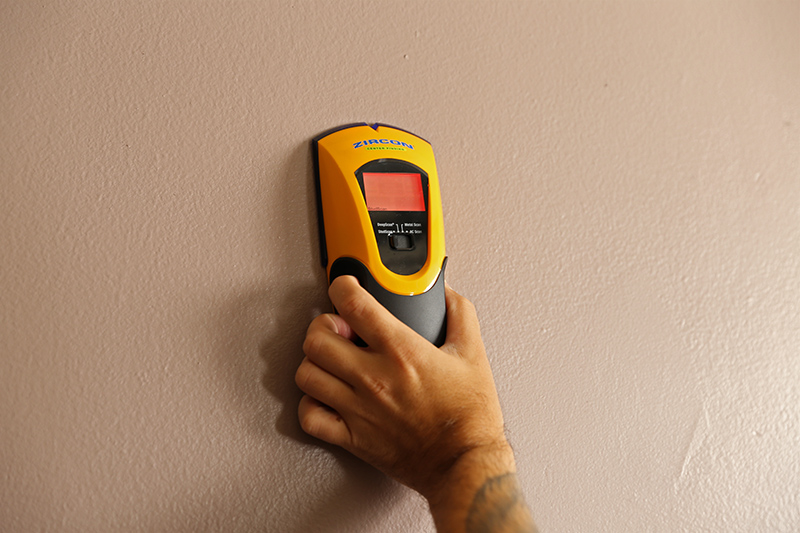
Before beginning to fix a patch on the drywall, make sure that there are no electric wires behind it. Often times, these wires are attached to the wall studs present inside the wall. Use a stud finder to find wall studs before attempting to patch drywall.
Step 2:
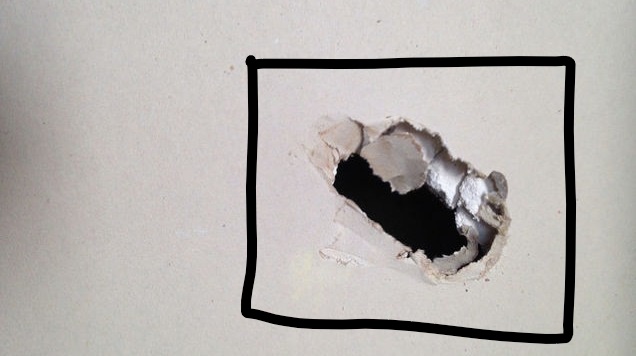
Once you’ve ensured that there are no wall studs behind the affected surface, measure the damaged area with a tape measure and use a pencil or a marker to highlight the area that needs to be repaired. Make sure the highlight entirely covers the affected area.
Step 3:
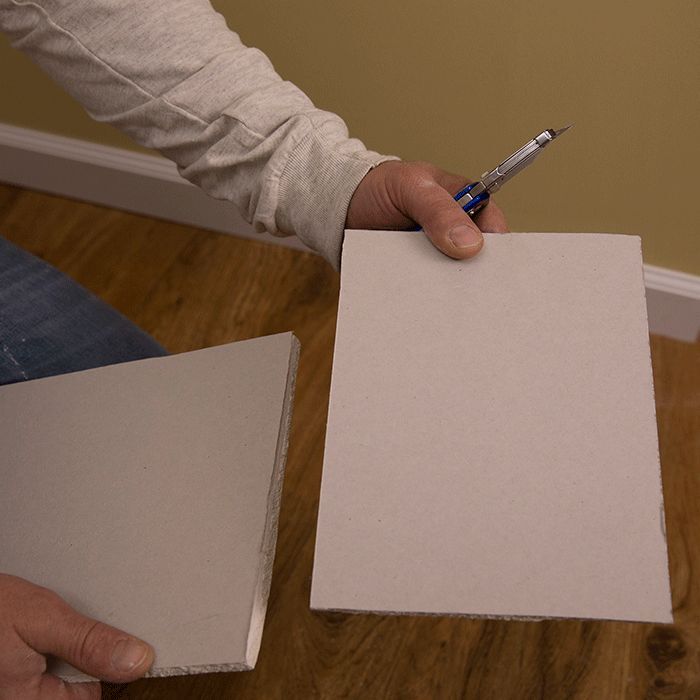
After highlighting the damaged area, cut out a piece of drywall that is at least 2 inches larger in width and height than the area that needs to be repaired.
Step 4:
After cutting the appropriately sized patch, apply a paper backing on the backside of the drywall before inserting it into the hole in the wall.
Step 5:
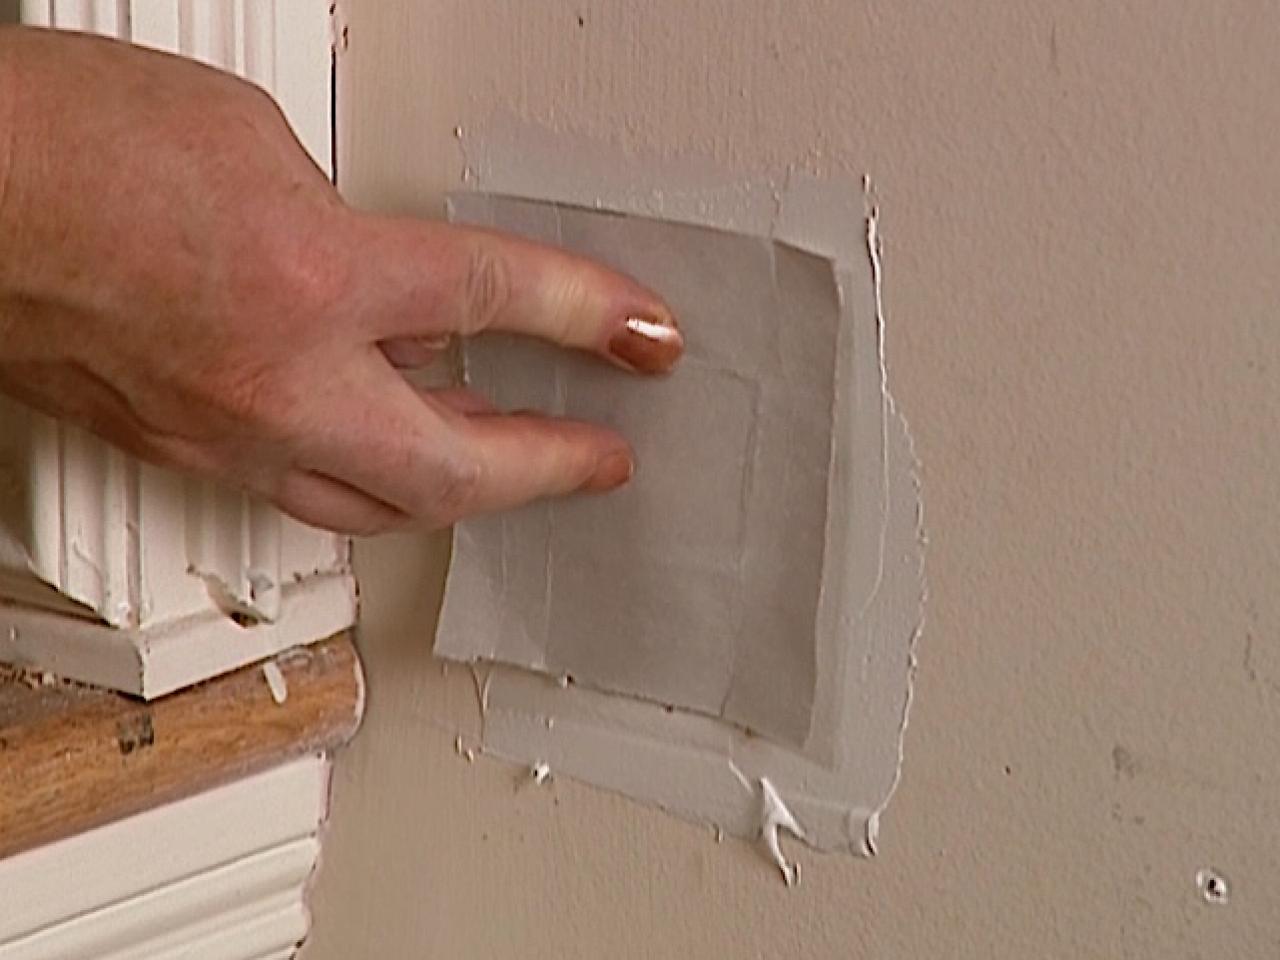
Now, insert the patch in the drywall but make sure not to include the paper border in the insertion so that the patch fits perfectly in the hole that has been created.
Step 6:
In the next step, apply joint compound using a putty knife and make sure that the entire surface becomes even and doesn’t look out of place.
Step 7:
Using the putty knife, cover the entire area with joint compound and make sure that all the lines are completely covered and not glaringly visible. Once the edges are indistinguishable from the rest of the wall, let the coat dry and the job will be finished.
Costs involved in a drywall repairing job:
If you wish to do the repair job on your own on smaller damages like a small chip or a hole caused by a doorknob then you can purchase a simple drywall repair kit for $6 to $16
However, the average cost to hire a drywall contractor for small to medium-sized damages in your drywall may cost from $75 to $150. However, if the damage is larger than that and requires an overall drywall replacement, the costs will become significantly higher and may run between $220 to $380 on an average.
Drywall can be damaged due to a lot of reasons. You can experience molding and collapsing drywall due to water damage that would require you to spend at least $2/sq. ft for repairs. For holes in the ceilings, the costs go up to $54–$180 on average.
For an overall drywall replacement job, the costs would include cost for new drywall panels which would be $48 on average, labor costs which could be $145–$150 on average as well as another $30–$40 for equipment and supplies. Therefore the total cost could very well go up to $230–$250 for a drywall replacement job.
This concludes the guide to repairing drywall as well as the costs of different kinds of damages that homeowners can experience when it comes to drywall.